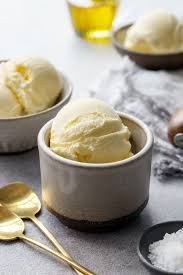
Stevia-Sweetened Ice Cream Recipe: Indulge in Guilt-Free Delight
Indulging in creamy, dreamy ice cream doesn't have to come with a side of guilt. With the magic of stevia, a natural sugar substitute derived from the Stevia rebaudiana plant, you can enjoy sweet treats without worrying about added sugars.
This Stevia-Sweetened Ice Cream recipe not only satisfies your sweet tooth but also nourishes your body with healthier alternatives. Let's dive into crafting this delectable dessert that's not just a delight for your taste buds but also a boon for your health.
Ingredients:
2 cups heavy cream
1 cup whole milk
1/2 cup Zindagi stevia powder (adjust to taste)
4 large egg yolks
1 teaspoon vanilla extract Pinch of salt
Instructions:
1. Prepare the Base: In a saucepan, combine heavy cream, whole milk, and stevia powder. Place the saucepan over medium heat, stirring continuously until the mixture reaches a gentle simmer. Be cautious not to boil it. Once the mixture simmers, remove it from heat and set it aside momentarily.
2. Whisk the Egg Yolks: In a separate bowl, whisk the egg yolks until they're light and frothy. Gradually add a small amount of the warm cream mixture into the egg yolks while whisking continuously. This process, called tempering, prevents the eggs from curdling. Continue adding the cream mixture slowly until the egg yolks are warmed. Pour the egg yolk mixture back into the saucepan with the remaining cream mixture. Stir well to combine.
3.Cook the Custard: Place the saucepan back over medium-low heat. Cook the mixture, stirring constantly, until it thickens enough to coat the back of a spoon. This usually takes about 5-7 minutes. Do not let the mixture boil; a gentle simmer is sufficient.
4.Flavor Infusion: Once the custard thickens, remove it from the heat. Stir in the vanilla extract and a pinch of salt. These ingredients enhance the flavor profile of your ice cream.
5. Chill the Mixture: Transfer the custard into a clean bowl. Cover the bowl with plastic wrap, ensuring that it touches the surface of the custard to prevent a skin from forming. Refrigerate the mixture for at least 4 hours or overnight until it's completely chilled.
6.Churn the Ice Cream: Once the custard is thoroughly chilled, pour it into your ice cream maker. Follow the manufacturer's instructions to churn the mixture until it reaches a creamy consistency.
7. Freeze and Serve: Transfer the churned ice cream into a freezer-safe container. Cover the container and freeze the ice cream for at least 4 hours or until it's firm. When ready to serve, let the ice cream sit at room temperature for a few minutes to soften slightly before scooping. Serve your Stevia-Sweetened Ice Cream in bowls or cones, garnished with fresh fruit or a sprinkle of stevia powder for an extra touch of sweetness.
Conclusion: With this Stevia-Sweetened Ice Cream recipe, you can indulge in the creamy goodness of homemade ice cream without worrying about excessive sugar intake. By using stevia, a natural sugar substitute, you can satisfy your sweet cravings while making a healthier choice for yourself and your loved ones. So, go ahead, scoop up a serving of this guilt-free delight, and savor every spoonful of sweetness that life, and stevia, has to offer.
#stevia #sweetener #steviabenefits #steviapowder #stevialiquid #steviadrops #steviasachets #zindagistevia #naturalsugarsubstitute
#steviasubstitute #steviarebudiana #stevialeaf #zerocalories #driedstevialeaves #zindagistevia #steviatablets

.jpg)

Comments
Post a Comment